The concept itself seems simple: light a match on a pile of wood, and bam—you know how to build a campfire! Through my years of experience, I have learned that it’s not always that simple.
As a kid, I was always practicing for real-life camping by setting up a campsite in my backyard. Before I got my first tent, I would use my dad’s old tent from his childhood. It was very basic and very beat up, but it worked for my purposes.
One night, I decided it would be a good idea to try building a campfire like I saw in the movies. I gathered up a small pile of sticks and lit a match. When I dropped the tiny flame on the stack of twigs, not much happened. The match quickly burned out.
So, I tried again. And again. And again.
Until finally, a fire caught—although not quite how I wanted it to. It sparked the dry grass beneath my pile and seared a chunk of our backyard. It didn’t last long, and it didn’t spread, but my dad found the burned patch in the morning and wasn’t happy.
Later on, I learned how to make a campfire the right way, and now I would like to teach you!
Getting Started: Safety First!
It is very important to take notice of how dangerous fire can be. A novice camper may not think it’s a big deal, but campfires are actually the nation’s leading cause of children’s camping injuries. They are also number one on the list of starting damaging forest fires.
Starting and maintaining a campfire can be difficult, and extinguishing it properly is a very real and serious responsibility. Learning how to do all of these things the right way can mean the difference between roasting marshmallows with your family and causing an all-to-real disaster.
About 88% of campfire-related injuries are children under the age of seven. Basically, if you have small children with you on your camping trip, take extra caution with them near a camping fire. Maintain a safe distance between them and the flames, and never let them sit near the fire unaccompanied.
A good distance would be about four feet. It can help to draw a circle in the dirt around your campfire to help your children (and you) recognize the boundary.
As for older children, teens, and adults, I would hope common sense would kick in to let you know that getting too close to a fire will result in a burn. Additionally, we all know that playing with fire is never a good idea; it’s how a lot of fires get started. Do me a favor—just don’t do it.
Find Your Site
The first thing you need to do after you have made all the safety rules clear is find your campfire site. Before you go on your trip, double-check your campground rules. Some campgrounds may have strict guidelines about building fires, and some may not allow them at all.
Don’t build a campfire in overly dry areas filled with lots of dry, flammable objects. For example, do not try to build a campfire in the middle of a field of dry grass. Don’t build one directly under low-hanging tree branches. And finally, do not attempt a campfire in the middle of a large section of fallen leaves.
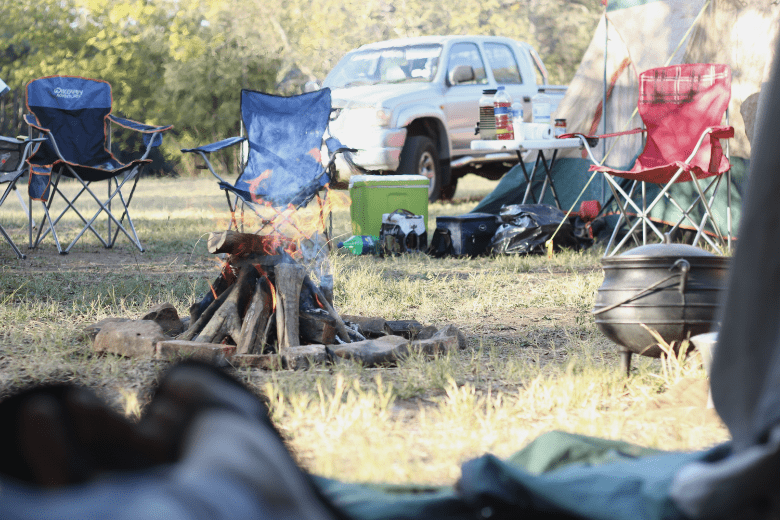
Locate a place where the ground is all gravel or dirt for at least ten feet in all directions. Your campsite may already have camping fire pits in place, usually made from stone. If those are available to you, use them. Keep the fire away from your tent, shrubs, and other objects.
If you have to make your own fire pit, choose a level spot. Monitor the wind to see which direction the gusts are blowing. Make sure there are no flammable objects in that direction behind your fire. If a large gust of wind comes, you don’t want it blowing flames and sparks onto your tent!
Prepare Your Site
Now that you have located a safe and open campfire site, it’s time to prepare it for flames. Remember, the area you have chosen should be clear from flammable things like grass, twigs, leaves, and additional firewood.
Dig your pit into the ground. It should be about a foot deep for the best results and the highest level of safety. Once you have your pit, collect large rocks and form a circular wall around the pit, outlining it. That’s all there is to prepping to site itself.
The next preparation step is gathering firewood.
Tinder, Kindling, and Firewood
A good fire needs three types of fuel. Those are tinder, kindling, and firewood.
Tinder refers to any small twigs, dry leaves, needles, or forest duff. This little stuff will ignite easily and help get your fire started.
Kindling is usually small sticks bigger than the twigs used for tinder. They are usually not thick and should be no bigger than one inch in diameter.
Finally, you need firewood. Firewood can be any larger piece of wood. These larger pieces are what will keep your fire going once it has started.
Make sure all of these items are dry. Wet wood, kindling, leaves, etc. will not work to start a fire and will only leave you frustrated.
Some campgrounds require that you use only local firewood. There is a concern for introducing new insects into their woods, which can cause larger problems like termites. Check with your campground about this before you go.
Backcountry-style camping is more of a do-it-yourself, roughing it kind of camping. In this case, you will have to forage in the woods for your supplies. Only gather what has already fallen to build a fire—never cut down branches or trees.
Building Your Campfire
Now it’s time to assemble the supplies you have collected—your tinder, kindling, and firewood. There are a few tried and true ways to set up these items, so I’ll walk you through all of them. Different campers have different preferences, but they all work in the end.
The Teepee
One of the most popular ways to set up a campfire is the teepee method. In this style, you should start with a few handfuls of tinder in the middle. Construct a cone of kindling around the tinder. Set your logs up vertically, all leaning towards the center against one another so that they form a teepee shape.
You should only have to use three or four logs at a time. Building the teepee this way will leave you with gaps, so you can reach the kindling to light it.
The Log Cabin
To build the log cabin campfire, place two large pieces of firewood next to each other, leaving some space in between them. This will be the base of your structure.
Next, lay two more slightly smaller pieces of firewood on top of your base in the opposite direction. Lay them next to each other with space in between like the first layer. This will form a square in the middle.
Fill the open square in the middle of the firewood with tinder. Repeat these steps with consecutively smaller pieces of firewood. Continue adding kindling and finish the top layer off with kindling and tinder across it.
In this version, it is very important to leave spaces between the firewood. Fire needs oxygen to stay alive and doing this will help with the airflow.
The Pyramid
Finally, we have the pyramid, which is also sometimes called the upside down. To begin this structure, lay three or four of your biggest pieces of firewood side by side to make the bottom layer. Add a second layer on top at a 90-degree angle to the first layer. Make sure the logs in your second layer are smaller than the first layer.
Carrying on with a few more layers, alternating and decreasing the log size as you go. When you have reached your desired size, lay kindling and tip across the top.
Let’s Light This Fire!
The best way to light a campfire is by using matches or a lighter. Most people go on a camping trip with these items packed. Lighting a fire without these items is very difficult, so I’m just going to pretend that you aren’t going to forget them! (Hint: invest in waterproof matches or fire starters)
This is where all that tinder and kindling you collected comes in handy. Start your fire by taking your match or lighter and setting the tinder and kindling on fire. For the best results, light it from all angles.
Once you have lit the tinder and kindling, blow lightly at the base of the fire. This technique provides the fire with more oxygen. Since fires thrive on oxygen, blowing on it can help the flames grow faster by increasing the intensity.
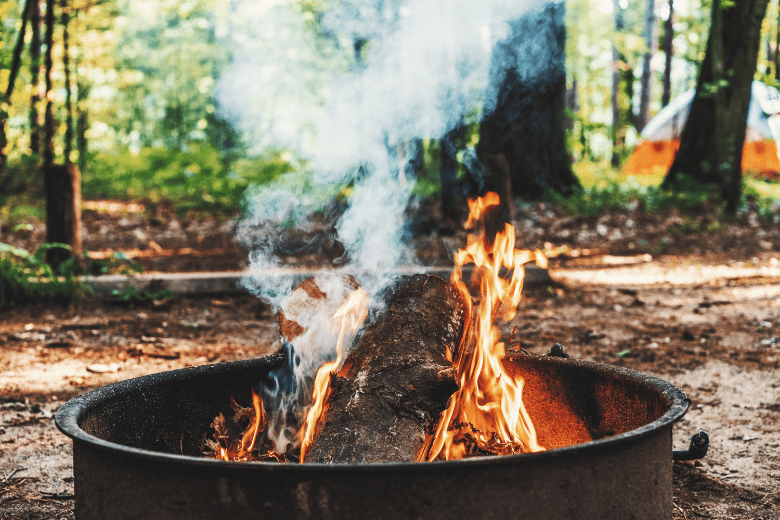
It may take a couple of tries, but the flames from the tinder and kindling should spread to your firewood, leaving you with an officially started campfire.
As your fire is burning, be sure to move the embers to the center. This will ensure that they burn completely.
You will have to keep a close eye on your fire, not only to keep it under control but to continue to feed it. Your fire will naturally burn down as it engulfs the firewood. To keep it thriving, continue to add firewood and kindling.
Be careful to not add to much extra wood or kindling too quickly. It is important to keep your fire small and under control the entire time it is lit. A good suggested size is 2’ x 2’ x2’. Pro tip: do not even think about using gasoline, diesel fuel, etc. to light a campfire; it’s very dangerous and quite frankly not a smart idea.
Put Your Fire Out
At the end of the night around the warm glowing flame, it is vital that you extinguish your fire before bedtime. Fire can get out of control very quickly, so if no one is actively using it or monitoring it, it needs to be put out.
If possible, let the fire burn through the logs completely, turning them to ash.
You should always keep plenty of water nearby throughout the entirety of your time by the campfire as a safety precaution. If you don’t have time to let the fire burn down, simply use water to douse it out. It is essential that you completely drown all the embers.
Pour water on the fire, then stir the ashes around. After that, pour more water on, continue this process until the hissing sound stops, there are no flames or burning embers, and the ashes are cool to the touch.
I cannot stress how important it is to make sure your fire is out 100%. As I mentioned, a campfire should never be left unattended. Even just a burning ember can start a fire back up again. Use plenty of water. You can also use dirt to put out a fire if you happen to run out of water. Just be careful to not accidentally bury a lit ember. Stir the dirt, or sand, into the embers with a shovel or another tool.
A good rule of thumb when putting out campfires: if it’s too hot to touch, then it’s too hot to leave.
Campfires, Not Forest Fires
Campfires are a staple of any camping trip. Without a campfire, you’re just a group of people sitting on a log in the dark in the middle of the woods. They provide warmth, light, and a means of cooking meals. Plus, one of the best parts of a camping trip is coming home smelling like a campfire.
When prepared properly and handled responsibly, campfires can be such a fun experience. Do things the right way. Follow these guidelines, stay safe, and never leave your fire unattended. Now go build a fire like an expert and roast some marshmallows!